In this series of discussions, I wanted to address specific problem areas that laboratories encounter while operating auto analyzers. These segments will each focus on the individual items that EZkem repairs, replaces, reconditions or in any way modifies while doing service in the field or in our repair facility, like inspecting the flow cell.
Initially, I would like to discuss the flowcell, which is arguably the most important section of the entire pathway utilized during flow analysis. This is where everything coalesces and the results of the sample collection, reagent preparation, and instrument operation come together to produce the final analytical conclusions. Often, an operator will report a variety of possibilities that they consider to be the cause of an inoperative system such as tubing, the heater, a cartridge, etc., but many times the problem can be simply resolved with a thorough examination of the flowcell.
Flowcells have several components that can be checked for performance issues and can be easily broken down, inspected, cleaned and/or rebuilt. The types of problems that signal me to check the flowcell include: noisy and drifting baselines, poor reproducibility, and poor peak shape. Ultimately these problems can be resolved by cleaning or replacing the glass flowcell windows.
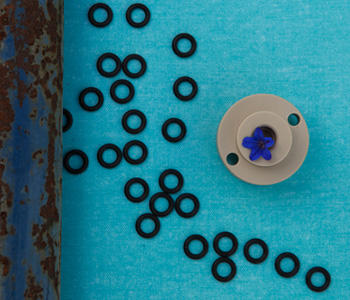
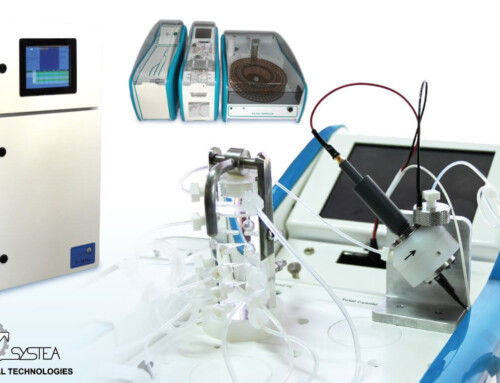
In order to closely inspect the window simply remove the setscrews on each side of the flowcell with the proper size allen wrench. Remove the O-rings on each side carefully with tweezers. The O-rings should be replaced if they are cracked, torn, or compressed since they will not properly press the glass window into the flowcell housing. Next, remove the glass windows, which should easily fall out by gently tapping; sometimes they may need to be tapped more aggressively if there is considerable buildup or much time has gone since it was last rebuilt.
The glass window should be inspected for physical damage and replaced if any condition exists that may interfere with the light path such as stains, buildup/coatings, breaks or cracks. If everything looks good, clean everything thoroughly with a solvent (alcohol) and dry thoroughly. Be careful not to contaminate or smudge the glass window when returning it into the slot. Next, carefully push the o-ring back into place (all the way to the bottom) so as not to damage the rubber with the threads of the setscrew. Finally, tighten the setscrew securely on each side.
Be sure to leak test the flowcell before placing it back onto the detector so that no damage will occur if there is indeed a leak. Test the flow signal first with water, then with reagents, and finally, with standards. Hopefully the problem is resolved, and if not, feel free to contact me directly anytime.
Leave A Comment